AT&T and Yahoo joined hands in the year 2013 and since then they have merged their email platforms to make it one big web service for all Yahoo and AT&T users. All the AT&T email accounts have been merged with Yahoo email addresses and their sign-in platforms are one and the same. Hence, users can sign in to myAT&T email account either from AT&T sign-in page or the Yahoo login webpage. Apart from this, AT&T domains such as @att.net and legacy “baby bell” domains namely @bellsouth.net and @sbcglobal.net etc. are now being widely used due to the inclination of Yahoo users towards these platforms.
Being that said, with the rising popularity of AT&T, users are now considering it to configure with AT&T on iPhone devices for easier access and better security. To enlighten you with the same, we have designed a step-by-step guide to introduce you to the right method to set up AT&T email on iPhone versions 7, 8, 11, and higher. But first, let’s walk through the latest AT&T email server settings.
AT&T Mail Settings for iPhone 7/8/11
| POP / IMAP | imap |
| Incoming server | imap.mai.att.net |
| Incoming port | 993 |
| SSl (security) incoming | SSL |
| Outgoing server | smtp.mail.att.net |
| Outgoing port | 465 |
| Requires sign-in | Yes |
Steps to Configure AT&T Email on iPhone
- Open Settings menu on your iPhone.
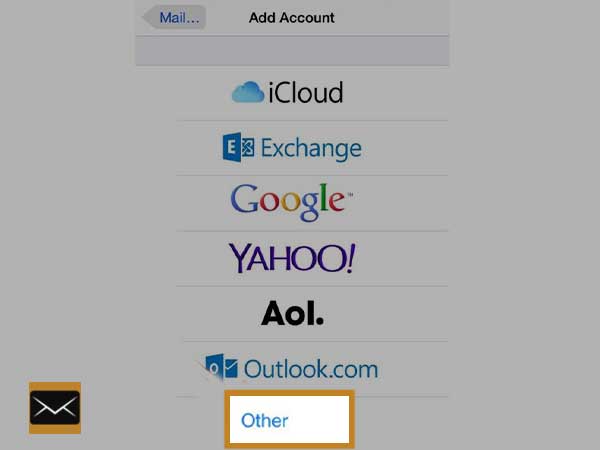
- Choose “Password and Accounts” and select “Add Accounts”
- Search for provider name and see if you can find the name of your email service provider i.e. AT&T. If you can find any option for AT&T, select “Others”.
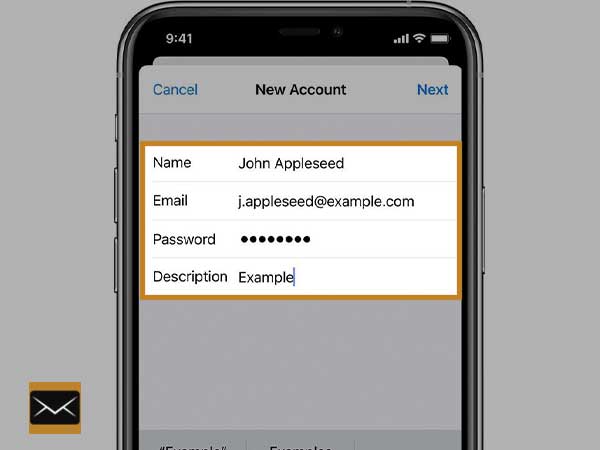
- Now, select Add Mail account and enter these details:
- Name: your name (any)
- Email: AT&T email address
- Password: AT&T email password
- Description: a short description
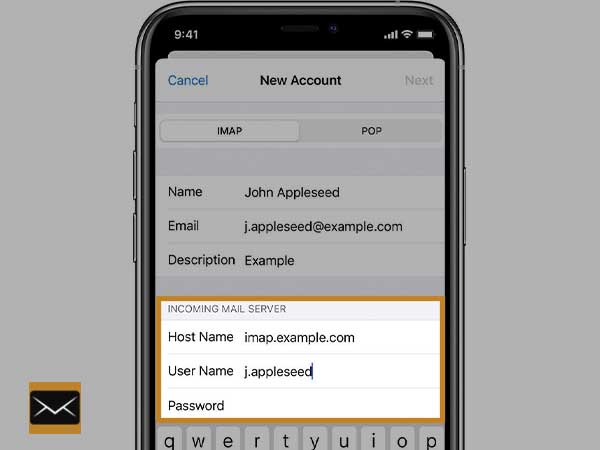
- Now, go to IMAP section, type-in these details for “Incoming Mail Server”
- Hostname: imap.mai.att.net
- Username: your AT&T email address
- Password: your AT&T email password
- In the “Outgoing mail server”, enter the details given below:
- Hostname: smtp.mail.att.net
- Username: your AT&T email address
- Password: your AT&T email password
- Click “Next”
- Now, you need to check the “Email” and then “Save”. Your email will be saved on your iPhone.
- To be sure whether the settings are correct are not, click on the email address you have added and click on “Advanced” and then go to “Incoming Server” which should have the information given here:
- Use SSL: on
- Identity check: password
- Server port: 993
- Go back to the previous screen and click “Outgoing Server”. Then, click on smtp.mail.att.net and make sure that the below given information matches with that you have on your screen.
- Use SSL: on
- Identity check: password
- Server port: 465
After completing all the aforementioned steps, click on the “Done” button and restart your iPhone, so that it can activate all the new settings. Now, you are all set to use your AT&T account on your iPhone for sending and receiving emails. For the cases where users encounter issues with the configuration of AT&T email on iPhone, contacting AT&T support platform is suggested.
Likewise, you can also read about: A Simple Guide to Set up and Verify AT&T Email on Windows Mail App