Not being able to attach files in Gmail emails can be frustrating, especially when your entire communication circle depends on Gmail. Thus, we have created a guide that consists of the top 9 solutions that will help you fix the Gmail attachment issues to regain Gmail’s ability to send and receive attachments.
- Check File size limit
- Turn off Extensions and Grant Email Permissions
- Install the Latest Version of the Flash Plug-in
- Clear Cache / Update the Web Browser
- Use Basic Attachment Uploader Instead of Advanced Attachment Uploader
- Disable Proxy Server from LAN Settings
- Temporarily Disable HTTPS
- Use Alternatives for Desktop Email Client
- Turn off Windows and Antivirus Firewalls
Solution 1: Check File size limit
Gmail is undoubtedly the best email service provider until you follow the limits determined by Google for its email users. The most significant aspect to consider while you are facing Gmail attachment errors is the total attachment size limit. Gmail restricts the attachment limit to 25 MB and exceeding it, will lead you to send and receiving issues. If you don’t know the ways of bypassing Gmail attachment limits, you are likely to encounter issues.
Whenever the attachment limit is exceeded, Gmail automatically converts the attachment to a link after uploading it to Google Drive. This way your actual attachment file is replaced by a link that will direct the recipient to Google Drive. Notably, Gmail doesn’t support executable files. In other words, if you have a file in .EXE format, sending it through Gmail is not practically possible. To overcome this issue, make sure you use supported browsers such as Chrome, Firefox, Microsoft Edge, and Safari.
Solution 2: Turn off Browser Extensions and Grant Email Permissions
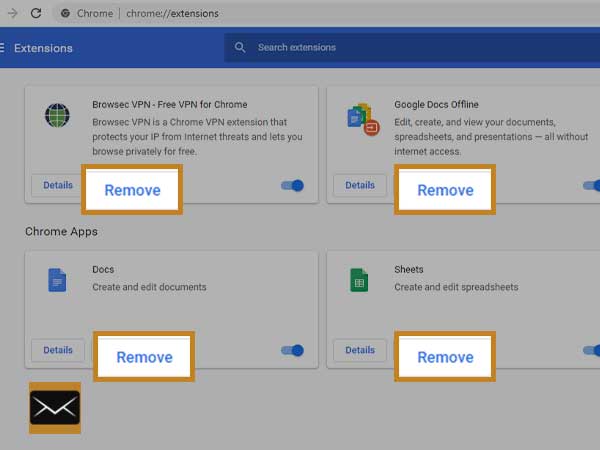
If you are unable to send files through your Gmail account, you should try disabling or removing extensions such as ad blockers as they tend to interfere with the functioning of your browser and prevent you from sharing files through email.
Once you are done removing all the extensions, you now need to allow all-important permissions to access your emails. When you can’t attach files on Android, you must check the “Storage permission” and “allow” them if not allowed already. To do so, go to “Settings >> Apps >> Gmail >> Permissions >> Storage” and let Gmail access files on Android.
Solution 3: Install the Latest Version of the Flash Plug-in
Flash Player is crucial to update your files as attachments, and thus keeping it updated is something that can’t be overlooked, because the previous versions of Adobe Flash player no longer align with the requirements of uploader service. So, having an older Flash Player version opens the gate for Gmail attachment errors.
So, if you are not able to send Gmail attachment files, you are suggested to visit the Adobe Flash Player page to install the latest version of your Adobe Flash. Get your Adobe Flash player and compare it with the version you are using.
After comparing your Adobe Flash version, get the latest version installed. Here are the steps using which you can follow the steps given below:
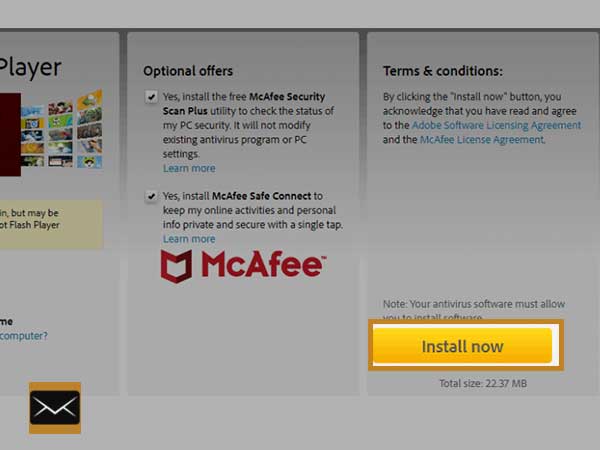
- Go to the official website of “Adobe Flash Player” using your regular-used web browser.
- Unselect all the additional options and checkboxes, if you don’t want to download any additional software.
- Click on the “Install Now” option to download and save the Flash Player installer file on your device.
- Go to the “Adobe Flash Player Installer” from the “downloaded files” of your device and open the “Adobe Flash Player” to begin the installation. This will take a couple of minutes.
- Now, make sure that Flash is enabled on the web browser you use. For enabling the same on Chrome follow these steps—
- Tap on the “Customize Google Chrome” button.
- Choose the “Settings” option.
- On the “settings” page, scroll down and select “Advanced” to expand more options.
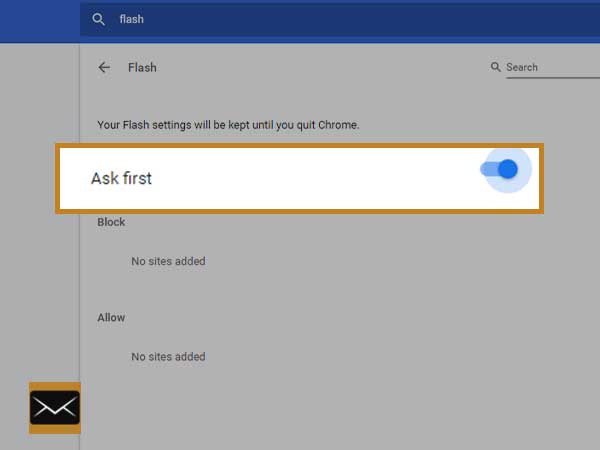
- From the list of options, tap on “Site Settings” and click on “Flash.” Or, use the search option to open “Flash.”
- Now, some corresponding options will open on your screen and you need to select toggle the switch for “Ask First” for allowing sites to run the “Flash” option.
After following these steps, your Adobe Flash Player will use the latest version of Flash that you have currently installed. Doing so will fix most of the attachment issues.
Solution 4: Clear Cache / Update the Web Browser
Gmail attachments are likely to come across issues when you are using a browser that is loaded with cache and cookies. Other than that, an outdated browser can also be one sort of culprit if you are not able to attach files in Gmail messages.
Henceforth, before investing your time in advanced troubleshooting methods, you should try cleaning your browser and installing the latest release of it. Start by clearing the cache, cookies, and history from the “Settings” menu of your browser.
| Important Note: If you are unable to attach files in Gmail Android, you should clear Gmail app or your Mail app’s cache from mobile Settings. |
Updating your browser to the latest version is another key to avoid getting an error while attaching files in Gmail. Most browsers contain an option to update the version of your browser to the latest one. For a better understanding, let’s proceed with the example of the most used web browser i.e. Google Chrome, follow these steps for installing the latest version:
- Step 1: To install an update for your Chrome browser, first click on the “Customize Google Chrome” button. A Chrome browser’s menu will appear in front of you.
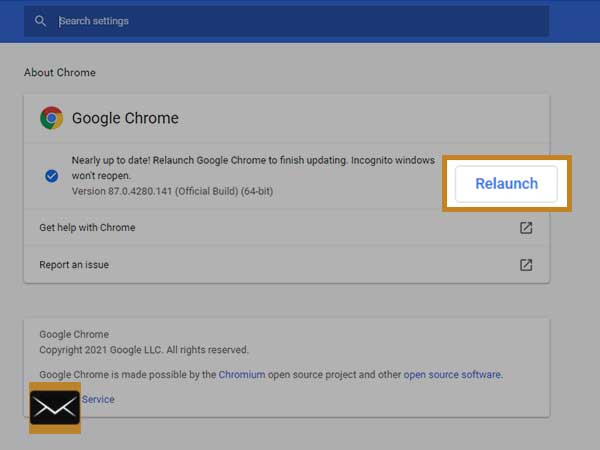
- Step 2: From the prompted menu, click on the “Help” button followed by selecting the “About Google Chrome” option. On the “About Google Chrome” screen, look for an update if available. If you come across a new version, you don’t need to perform a manual installation as it gets uploaded automatically.
- Step 3: You just need to click on the “Relaunch” button to complete the updating process of Chrome. Afterward, restart your browser to use the latest version of it.
Solution 5: Use Basic Attachment Uploader Instead of Advanced Attachment Uploader
This might sound peculiar, but this is one very effective hack. Users often get tempted towards the word “Advanced” and enable any setting that has this word with it, but not all advanced settings are useful. The same goes with Gmail’s attachment uploader. The “Advanced Attachment Uploader” allows multiple file attachments to be uploaded in a single email, which is no way better than the “Basic Attachment Uploader” that allows sharing only one file at a time. Because sharing multiple attachments at once bulk up your email and enhances the chances of Gmail attachment issues.
Here are the steps to perform the switch:
- Step 1: Tap on the ‘Gear icon from the upper right corner of your Gmail account screen.
- Step 2: Now, click on “See all settings” and then select the “Mail Settings” option.
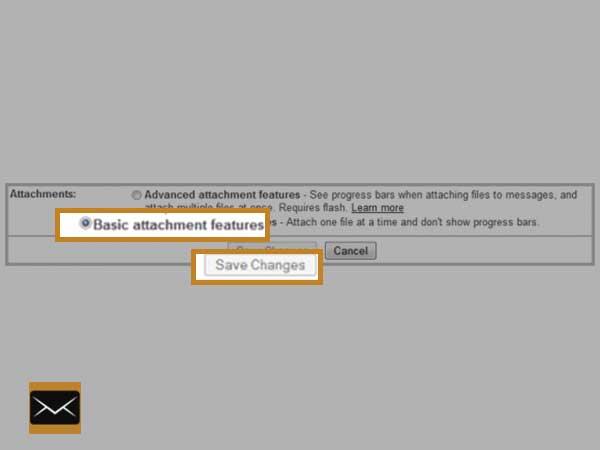
- Step 3: From the “General” tab, select “Attachments” and from there switch from “Advanced attachment features to Basic attachment features.”
This is one of the most effective ways to fix the “Gmail Won’t Attach Files” error in no time.
Solution 6: Disable Proxy Server from LAN Settings
Proxy servers can also be one of the reasons why the “Gmail attachment failed error” is appearing back to back on your screen. Hence, check if your web browser proxy is enabled for your LAN settings, and if it is, you are advised to switch the web proxy off using the steps given below:
- Step 1: Click on the ‘Windows Logo Key’ using your keyboard from the Windows menu.
- Step 2: Now, select the “Internet Properties” option.
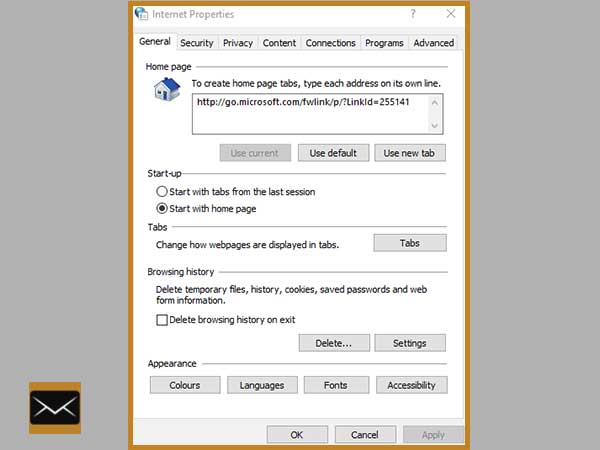
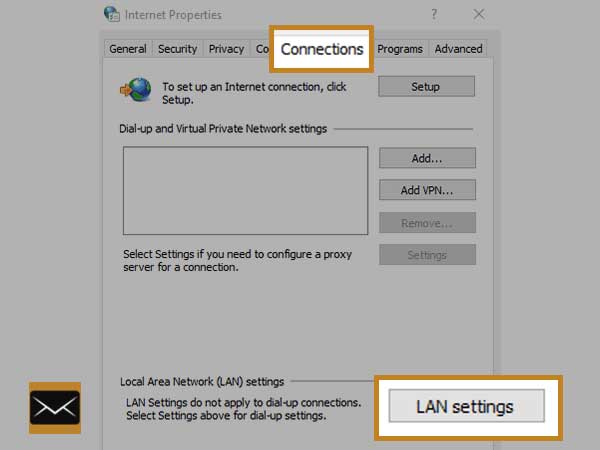
- Step 3: After this, a new window will pop up on your screen, from where you need to select “Connections”. Then, click on the “LAN Settings” button.
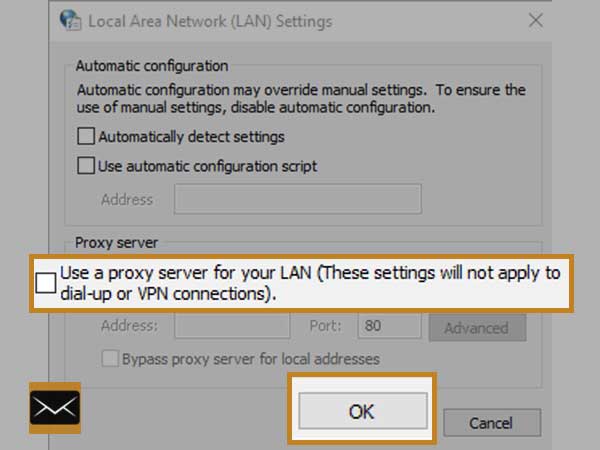
- Step 4: Uncheck the box for the “Use a proxy server for your LAN setting” option. And, after this deselect the same and click on the “OK” button to end.
Solution 7: Temporarily Disable HTTPS
“HTTPS” is the best way to secure your internet services. But for fixing the attachment issues, you are supposed to turn it off. This solution can be one of your last resort. Furthermore, to turn the “HTTPS” off, follow the steps given below:
- Step 1: Start by signing in, Gmail account from www.gmail.com.
- Step 2: Now from the Gmail account’s “Settings” select the “General” option.
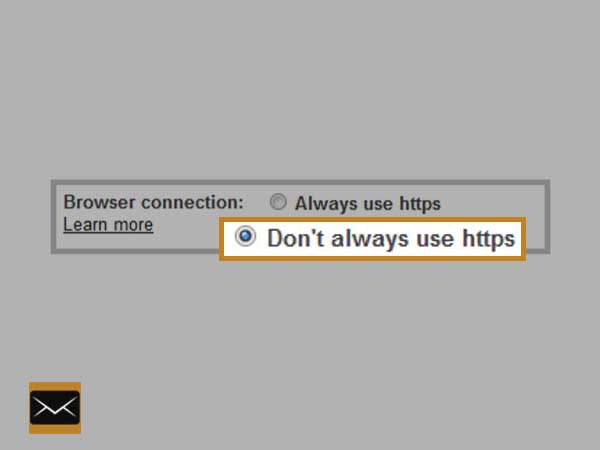
- Step 3: From the prompt screen select the “Browser Connection” option.
- Step 4: After this, uncheck “Always use HTTPS” and select the “Don’t always use HTTPS” option.
Solution 8: Use Alternatives for Desktop Email Client
If nothing is working, we suggest you use another desktop email client as Gmail’s webmail client is not the only option to access your Gmail email account.
Apart from using the Gmail app, you can consider using “Mail bird, Thunderbird, and Microsoft Outlook.”
All you need is to enter your username, password, and Gmail server settings to get your email account configured. Here are the server settings that you need to add your Gmail account on other email clients:
| ‘IMAP/POP’ & ‘SMTP’ Gmail Server Settings | |
| Incoming & Outgoing IMAP Server Settings | Incoming & Outgoing POP3 Server Settings |
| Incoming Server – imap.gmail.com Outgoing Server – smtp.gmail.com Incoming Server Port – 993 Requires SSL Encryption – Yes Requires TLS Encryption – Yes (If applicable) Outgoing Server Ports – 465 with (SSL) and 587 with (TLS) | Incoming Server – pop.gmail.com Outgoing Server – smtp.gmail.com Incoming Server Port – 995 Requires SSL Encryption – Yes Requires TLS Encryption – Yes (If applicable) Outgoing Server Ports – 465 with (SSL) and 587 with (TLS) |
Solution 9: Turn off Windows and Antivirus Firewalls
Apart from the proxy server, the other thing that the Gmail’s ability to send and receive attachments is Antivirus and Firewall. Therefore, it is suggested to switch off your antivirus or firewall programs for a short duration, mainly while facing a Gmail account issue. In order to stop the firewall, just follow these instructions:
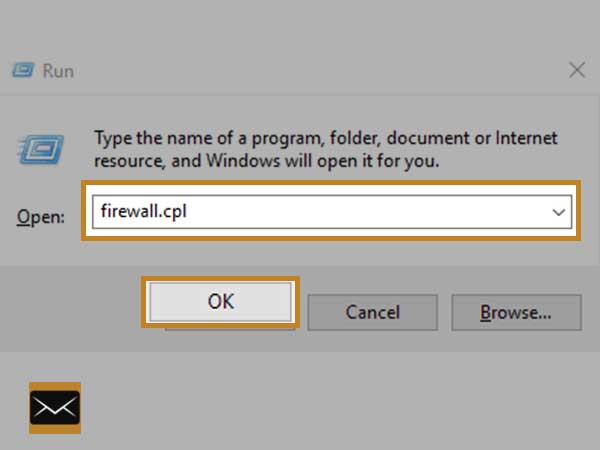
- Step 1: Open the “Run Dialog-Box” by pressing and holding“Windows + R” keys together.
- Step 2: In the next window, enter “firewall.cpl” and press the “OK” button.
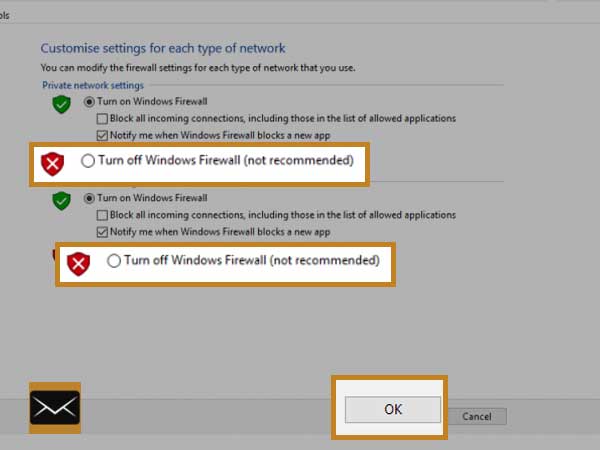
- Step 3: From here, turn off the Windows Firewall using the “Customize Settings” tab.
| [Note: Alternatively, you can follow this: Click on “Windows Menu > Control Panel > All Control Panel Items > Windows Firewall > Customize Settings.”] |
- From the “Customize Settings’ tab, select the two “Turn off Windows Firewall” options.
- At the end click the “OK” button and close the tab.
However, if you are using a third-party antivirus program, we suggest you turn it off from the in-built settings of the software. Alternatively, you can shut down the third-party antivirus program by right-clicking on the notification area of the program and selecting the “Disable or Turn off” option.
This step is very important to ensure that your firewall or antivirus aren’t creating a “can’t attach PDFs and files to Gmail.” error.
Final Words
With these 9 corrective methods, you can fix the “Gmail Attachment Not Working” error to share and receive files and documents on Gmail in a seamless manner.
Nevertheless, if these general solutions are not working out, you can contact the Google team to get personalized help. All you need is to use the Gmail support contact form and communicate your issue to the Gmail team.