Gmail is one of the most used emailing software and falls under the category of giant email service providers. It is renowned in its arena and possesses a large number of users across the globe, but on the other side, you will also get to see the downside of it.
Sometimes people complain about the service of Gmail like “Gmail is not sending emails on iPhone“, “Gmail is not sending emails and is stuck in the Outbox”, etc. One of the proofs of it is added below.
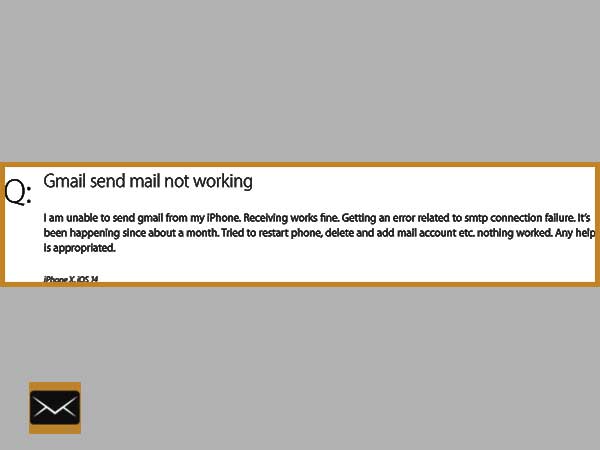
If your case is similar to the above one, and you are also looking for the solutions to tackle it, you have landed in the right place. Here, you will get detailed solutions with screenshots (wherever required).
Before that let me share an incident with you, after reading this you will surely get the idea about how tough the situation becomes when you can not send the email.
Once, Mike was thinking of sending an important email to the client. For this purpose, he used Gmail and, since he was outside, tried sending the email using an iPhone. He typed the email and pressed the “send” button. After a while, he got an email stating that the email was not sent. This time he got confused and after reaching home, he tried the same process on the desktop, but this time also he got no luck. After wasting so many hours searching for solutions, he resolved the issue and sent the email successfully. Earlier, the process was confusing for him but since he was tech-savvy so faced no issue while resolving the issue.
But do not worry if you are not technically sound, as you will find the solution written in a lucid way.
Reasons Why Gmail is Not Sending Emails
Before getting into the solutions, let’s proceed with the possible reasons why this issue is happening to you, So that you do not repeat the same mistake in the coming future. So, here are the reasons:
- You are trying to send a large number of emails at the same time.
- You have misspelled the recipient’s email address
- Your device has a poor internet connection
- Configuration settings are not valid
- Gmail server is down in your region
And so on.
After covering the reasons, let’s proceed with the solutions to tackle the above-said issue.
So, let’s begin it for the web browser’s users and later will proceed with the Android and then iPhone users.
Gmail is Not Sending Emails on Web Browser
There are so many users who use Gmail in the web browser (like Google Chrome, Mozilla Firefox, etc.). Sometimes, they face issues while sending emails. So, to cope with this, numerous solutions are mentioned in the forthcoming passages. Go through them and get the issue resolved. Additionally, If you are facing the “Gmail is not sending emails on Windows 10” issue, that can also be resolved from the below solutions.
Solution 1: Check Recipient Email Address
While sending the email, sometimes you enter a misspelled email address. So, keep check of it and recheck the recipient’s email address every time you hit the “Send” button.
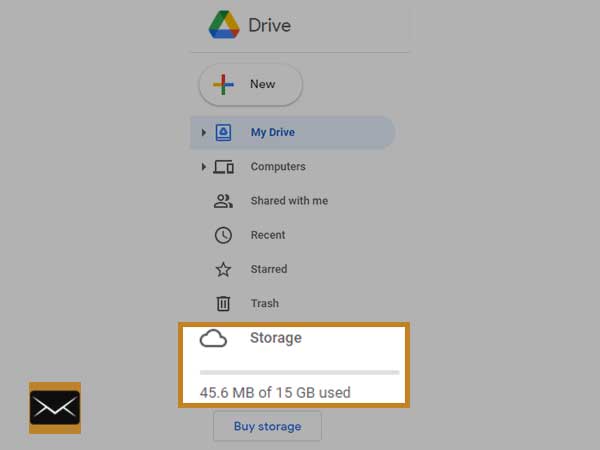
Solution 2: Check Gmail Storage
If you have reached the threshold of Gmail’s cloud storage, most probably you will not be able to send or receive the email. To get rid of it, either you may delete some data on the cloud or buy the storage plan from Gmail.
To check how much storage is available on the cloud, you may go to Google Drive from here.
Solution 3: Restart The Computer
Restarting a computer is one of the easiest solutions. The need for this solution lies in the fact that sometimes, a web browser does not have sufficient memory, and it struggles to run smoothly. After restarting the computer, memory is distributed from the very beginning, and as a result, the web browser gets enough memory to work without any obstacle.
To restart a computer, you should follow the below steps
Step 1: Click on the Windows start button
Step 2: Choose the “Power” option
Step 3: A menu will open up and choose the “Restart” option

Once the computer restarts, open up the web browser and log in to Gmail. Afterward, try sending the email. I hope this solution will resolve the issue successfully.
Solution 4: Analyze Daily Email Sending Limit of Gmail
Generally, on a daily basis, a Gmail user is allowed to send 2,000 emails. If you are exceeding this limit, you will be facing the “Gmail is not sending emails and queued” issue. To resolve this issue, you must wait for the day to come to an end and on the next day, the email sending issue will get resolved automatically.
Solution 5: Clear Web Browser’s Temporary Files (i.e., Cache and Cookies)
The main aim of these temporary files is to smoothen the process of accessing any website, and these files are stored automatically in the web browser’s memory. When all these files become large, the web browser starts lagging, and eventually, you will start facing varying issues from time to time.
The procedure to delete cache and cookies is below.
Have a look.
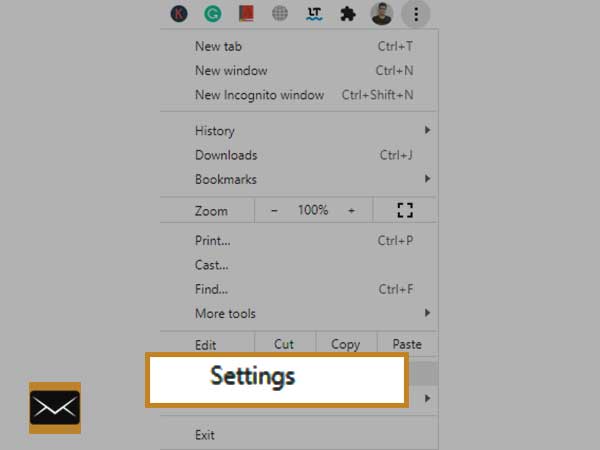
Step 1: Go to Menu by clicking on the three dots, as shown below in the image.

Step 2: Choose option “Settings”
Step 3: Choose “Security and Privacy”
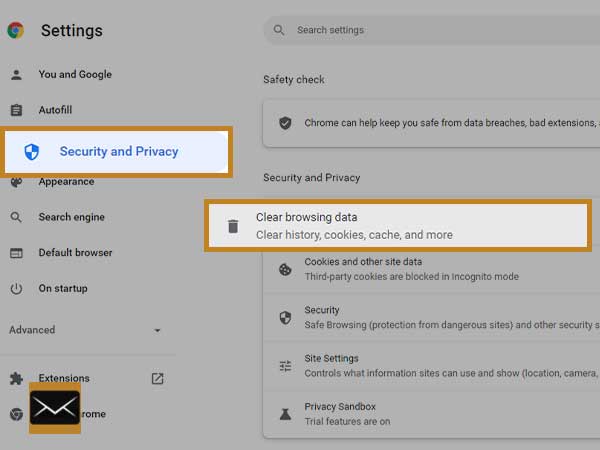
Step 4: Now choose the “Clear browsing data” option
Step 5: A new window will pop up as shown below. Here, you are supposed to tick on all checkboxes and select the time range to “all time”
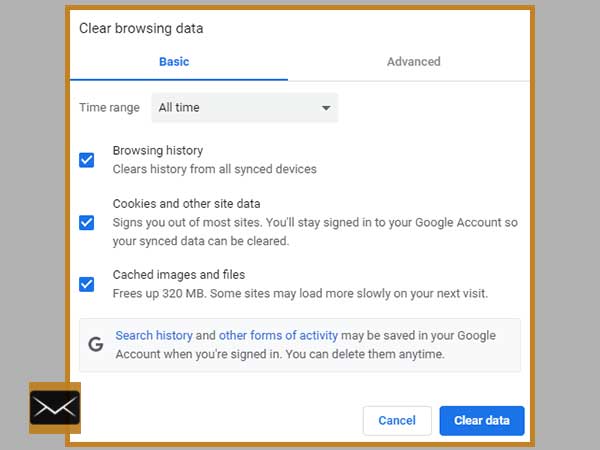
Step 6: Once you are done with checkboxes, click on the “Clear data” button
By following the above steps, you will be able to clear the cache and cookies from the web browser. Now, check whether you are able to send the email successfully or not. If the problem persists, go for the next solution.
Solution 6: Update the Web Browser
An outdated web browser can cause the issue. So, it is advised to check for updates periodically. As with every update, the web browser becomes efficient to tackle any bug. As a result, the web browser works smoothly. The procedure to update the web browser is below.
Step 1: Go to the menu from three dots and choose the “Settings” option
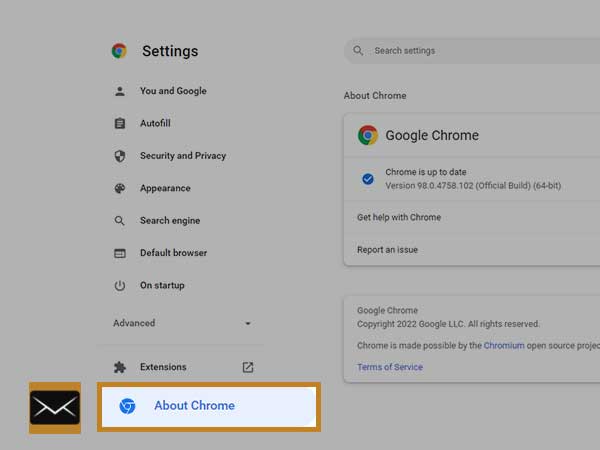
Step 2: A new window will open up as shown below in the image, and choose the “About Chrome” option located at the bottom on the left side of the screen.
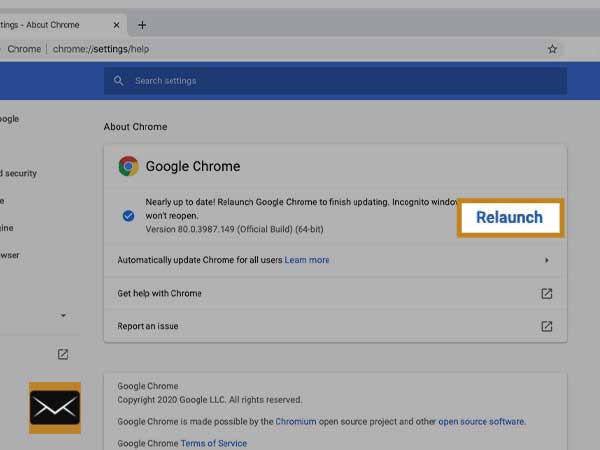
Step 3: On the right side, you will see the interface as depicted below. Once your web browser updates successfully, it will ask to relaunch the web browser. Click on it and wait for the web browser to restart.
So, these were the steps to update the web browser. After following them, check whether the issue persists or not.
Solution 7: Switch to Another Web Browser
There are plenty of web browsers available like Google Chrome, Mozilla Firefox, Safari, and many more. Try switching to another web browser. If still, you are not able to send the email, go with the next solution.
The download link of the most popular web browsers is below, choose any of them according to your wish.
Solution 8: Disable Extensions
The main motive of an extension is to ease the work, but sometimes when these extensions become large in number and start creating obstacles. To get rid of this, all you have to do is disable them and check if it resolves the issue or not.
Steps to disable the extension are below. Have a look.
Step 1: Click on three dots (located in the top right corner of the screen)
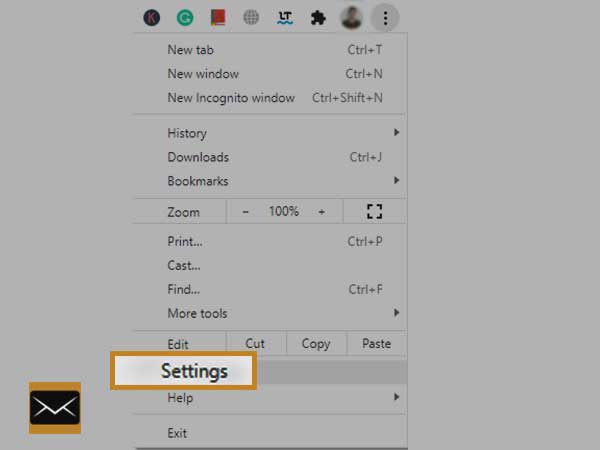
Step 2: Now a pop-up will open, choose the “Settings” option
Step 3: A new window consisting of several options on the left pane will open up, choose the “Extensions” option
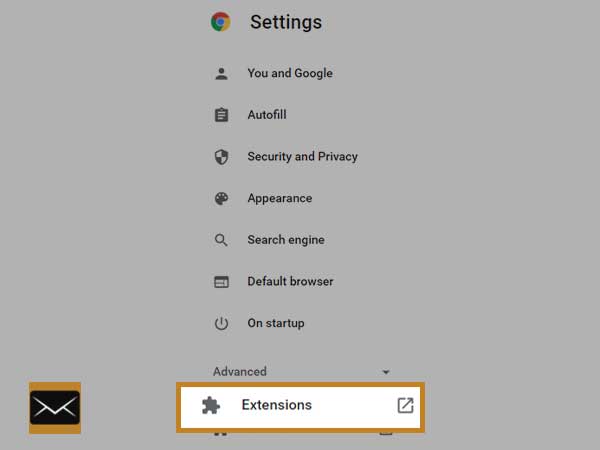
Step 4: Now you will see a list of installed extensions, disable them all by clicking on the disable button as shown in the image.
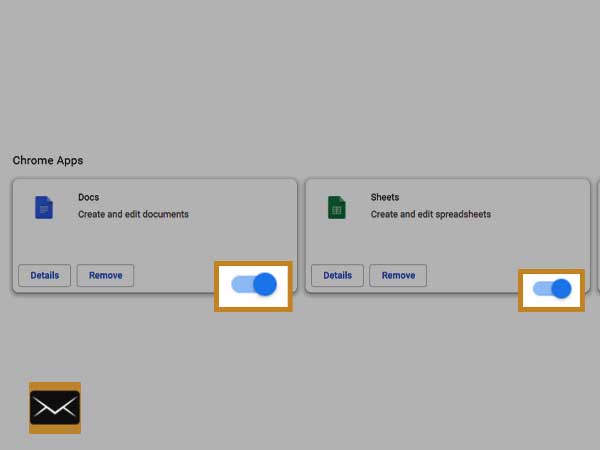
Once you have disabled all the extensions, it is time to send the email and check whether the issue still persists or not.
Solution 9: Make Email Body Spam-Free
While writing the email, make sure the body of the email does not have any content which can be classified as spam. When I say spam, it can be non-authentic links or any promotional content. So, while composing the email, make sure you do not mention any of the spam-related content.
Solution 10: Disable Security Programs
Security programs are essential to have on a computer. These programs help you to get rid of any bugs or viruses. Sometimes, these security programs create an obstacle and do not let the software operate properly. To check whether the antivirus is causing the issue in your case or not, try disabling the antivirus for a while and send the email. If you are able to send the email successfully, for sure, antivirus was creating the obstacle. In this case, you need to replace the antivirus immediately.
Solution 11: Examine Attachment Size
The minimum permissible attachment size is 25 MB. If you are attaching an attachment while composing the email, make sure it is equal to or less than the minimum attachment size. If it is not, your email will not be transferred to the required recipient.
Solution 12: Disable VPN (Virtual Private Network)
If you are using VPN, try disabling it. It may be possible that VPN is interfering while sending the email. After this, send the mail using Gmail and check whether the issue persists or not. If you can send the email without facing any problem, that clearly indicates that the problem was related to VPN.
So, this was all about “Gmail is Not Sending Emails on Web Browsers”.
Now, let’s proceed with solutions to the “Gmail is not sending emails” issue on Android and later with an iPhone.
Gmail is not sending emails on Android
If you are an Android user and not able to send emails via Gmail, do not worry, as to tackle this issue, you may follow the numerous solutions provided below.
Solution 1: Clear Cache and Temporary Files
Temporary files are helpful as they reduce the loading time of images, scripts, and much more. But when the temporary files start taking huge space, it leads the software towards lagging and creates obstacles in the proper functioning of the software application or web browser. To cope with this, you may follow the below steps.
Step 1: Unlock the mobile phone
Step 2: Tap on the “Settings” app
Step 3: Search and Go to “App Manager, All Apps, or Manage Apps”
Step 4: Search and Locate the “Gmail” app
Step 5: Tap on the “Storage” option
Step 6: Now tap on the “clear data” option
Step 7: Choose “Clear All Data”
By following the above steps, you can easily clear up the temporary files of the Gmail app.
Solution 2: Remove and Re-Add The Gmail App
If none of the above solutions worked for you, try reinstalling the Gmail app. The steps to achieve this are mentioned below. Also, if the Gmail app can not be uninstalled, try uninstalling its updates.
So, firstly, the uninstallation of Gmail app updates will be carried out, and later the uninstallation of the app will be done.
Let’s get started.
Step 1: Unlock the mobile phone and tap on the “Settings” app
Step 2: Search and tap on the “Apps” option
Step 3: Go to “Manage Apps”
Step 4: Search and locate “Gmail” app
Step 5: Tap on “Uninstall Updates” (located at the bottom of the screen)
Step 6: Now, open up the “Play Store” app
Step 7: Search for “Gmail” app
Step 8: Tap on the “Install” button
Step 9: Restart the mobile
That’s it. Now, try sending the email and check whether the email is sent or not.
Solution 3: Re-Add Google Account on Android
If reinstallation of the Gmail app did not resolve the issue, this solution of re-adding the Google account on the Android mobile will help you a lot. The steps to achieve the same are below.
Have a look.
Step 1: Unlock the Mobile phone and tap on the “Settings” app
Step 2: Search and Tap on the “Accounts and sync”
Step 3: Tap on “Google”
Step 4: Choose the Google Account by tapping on it
Step 5: Tap on the “more” option and choose “Remove Account”
Step 6: Restart the Android mobile.
Step 7: Now again follow “Step 1” and “Step 2”
Step 8: Scroll to the last and tap on the “add account” option
Step 9: A list will open up, choose “Google”
Step 10: A prompt to enter the password will raise (if any)
Step 11: After entering the password, Enter credentials to log in to the Gmail account
Thus, after following the above steps, the Google account will be deleted and re-added to the Android mobile.
Solution 4: Update the Gmail App
When it comes to an app, updating it is a vital thing and should be carried out periodically. It is because every update provides immunity to the software from bugs. Eventually, this leads an app to work smoothly without facing any obstacles. Steps to update the Gmail app are below.
Step 1: Unlock the Android device and tap on the “Play Store” app
Step 2: Once “Play Store” is opened, search and tap on the “Gmail” app
Step 3: Tap on the “Update” button
Thus, the Gmail app will be updated. Now, check whether the Gmail app is sending an email or not.
Gmail Is not Sending Emails on iPhone
If Gmail is not working properly on iPhone, it is necessary to resolve this error on the very first basis and later on proceed with another issue titled “Gmail is not sending the emails on iPhone”. The solutions to tackle the latter part are below.
Solution 1: Enable the IMAP
In order to use Gmail on the iPhone, IMAP should be enabled. This can be enabled via Gmail settings, and steps to achieve the same are below.
Step 1: Unlock the iPhone and tap on any web browser
Step 2: Go to the Gmail website from here
Step 3: Now, login to it by entering the correct credentials
Step 4: Once you are logged in to Gmail, scroll to the last and choose “Desktop version”
Step 5: Now, tap on “Settings”
Step 6: Choose the “Forwarding and POP/IMAP” option as shown in the below image
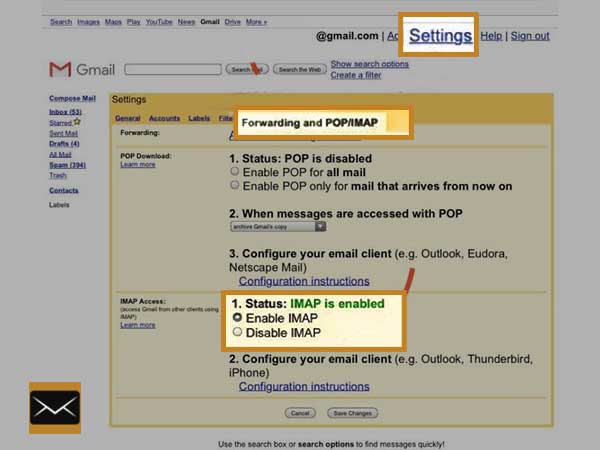
Step 7: Tap on the radio button in front of the “Enable IMAP” option
Thus, the IMAP will be enabled after undergoing the above steps. Now, check the Gmail app, is it still facing the same issue.
Solution 2: Check For Alert Email
Whenever you try to log in to Gmail via iPhone, chances are you will get an email stating that “We blocked a sign-in attempt” or something similar to it.
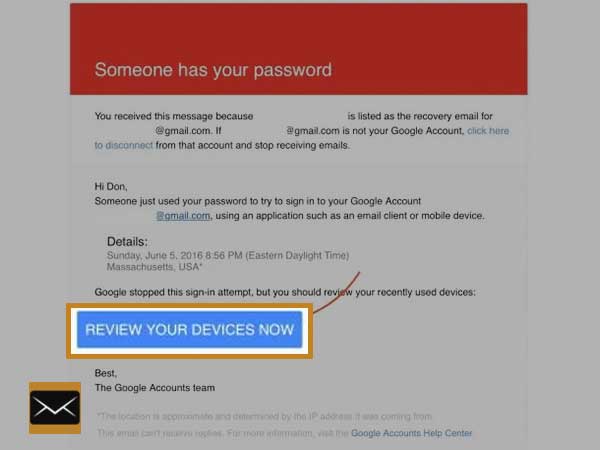
So, you should follow the instructions provided in the email, and soon you will be able to log in to the Gmail account on iPhone.
Solution 3: Review Recent Devices
Reviewing recent devices is a good idea if you are not able to access Gmail on your iPhone. Here, you will get a list of all devices on which you tried logging into Gmail. In case you are not able to access Gmail on a specific device, go to the “Review Recent Devices” page and give permission to that specific device.
To access the recent devices, follow the steps below.
Step 1: Log in to Gmail by entering the correct credentials.
Step 2: Go to Review Recent Devices from here
If you are not able to access the page, make sure you are logged in to Gmail.
Solution 4: Remove and Add The Gmail Account Again in iPhone
Removing the Gmail account from the iPhone does not delete anything from the Gmail server. It is quite safe as the data stays as it is. It is advised to follow this solution only when none of the solutions is working for you.
Steps to remove the Gmail account from iPhone are:
Step 1: Unlock the iPhone and tap on the “Settings” app
Step 2: Go to the “Mail” option
Step 3: Choose “Accounts” and tap on the Gmail account
Step 4: Now, tap on the “Delete Account”, as shown in the below image.

Steps to add the Gmail account are as follows
Step 1: Unlock the iPhone and tap on the “Settings” app
Step 2: Tap on the “Mail” option
Step 3: Tap on the “Accounts” option
Step 4: Now, tap on the “Add Account”
Step 5: A list will open up, choose “Google” from the list.
Step 6: Now, enter the credentials to log in successfully to Gmail.
Some Common Solutions for Android and iPhone
Solution 1: Re-Examine The Recipient’s Email address and Email Content
Rechecking everything from the beginning after the completion of an email is a good practice. Otherwise, an email will be sent but will not be received by the recipient, and eventually, the email will be transferred to “Outbox”. Additionally, you should also check the content of the email, it should not look promotional or anything similar to spam.
Solution 2: Check IMAP and POP Configuration Settings
If you are not able to send the emails using your mobile device, just try reconfiguring the configuration settings i.e., SMTP, POP, IMAP. These are provided below.
For SMTP
Host- smtp.gmail.com
Port- 587
SSL Protocol- OFF
TLS Protocol- ON
Username- Your Gmail Username
Password- Your Gmail Password
For IMAP
Host- imap.gmail.com
Port- 993
Encryption- SSL
Username- Your Gmail Username
Password- Your Gmail Password
For POP
Host- pop.gmail.com
Port- 995
TLS Protocol- ON
Username- Your Gmail Username
Password- Your Gmail Password
Before using these settings, it is required to enable the POP or IMAP in the Gmail “settings”, else you will not be able to send or receive the emails on your device.
Solution 3: Check Outbox
If you composed an email and pressed the “send” button, but unfortunately the email was not sent to the target recipient, in this case, you should check the “Outbox” and find the email which was not sent. Once you get that email, try sending it once again. Hopefully, if everything went well, it will be sent to the recipient.
In case, Gmail is not sending emails to a certain address, that can also be resolved using above said solutions.
If you are keen to know more about Gmail related issues, you may like